
CHAPTER 1: THE ANATOMY LESSON
Contents
CHAPTER 1: THE ANATOMY LESSON
THE 5TH VICTIM CRIME SCENE
Victoria arrives at the crime scene. Officer Tate is blocking the entrance, so talk to him for a while and give him a cup of coffee. He will tell you that Miller is upstairs waiting for you. Once he moves aside, go in and head upstairs. Talk to Miller, give him some coffee and get his camera. Go through the door behind Miller and you’ll be at the actual crime scene.
Don’t worry about the evidence right now, since you are still holding coffee and don’t have the right tools. Keep walking through the hallway until you see someone else. This is Claire, and she is processing the bathroom. Give her some coffee. She will ask you to gather evidence, so head to the kitchen area (just behind Claire) and inspect her suitcase. Finally, you get rid of the last cup of coffee, and you can now take the forensic tools with you: cotton swabs, luminol, film, tweezers and black light filter. Open your inventory and combine the camera with the film. Now you can take photos.
Go through the doorway to the left. Inspect the dolls hanging from the ceiling and the coat hanger on the left side of the doorway. In the close up, you can see some fibers on the nail. Take a photo. Grab the tweezers and pick up the fibers. Now go through the door near the coat hanger.
Use the camera to take a photo of the bloodstain, and then use a swab on it. Don’t bother with the pile of junk – you will come back to that after. Walk to the forensic lamp and use the filter on it. Spray some luminol on the wall to reveal a message: Sanctuary. Use the camera and take a photo. Take the filter from the lamp and move to the next room, which is the bedroom, on the right.
Inspect the bloodstain. Take a photo and then use a swab. Again, use the filter on the lamp. Spray the wall with luminol to reveal another message: “Disturbed”. Take a photo with the camera. Leave the bedroom and go to the kitchen, where Claire’s suitcase is. Place the evidence in the suitcase. Now you can talk to Claire and actually see the victim in the bathroom.
Claire tells Victoria that she will meet her back at the office. Walk Victoria out of the apartment, towards the staircase. Another cinematic is activated, and the stairs crumble into a pile of rubble. Now you have to find another way out of the building.
Go to the side of the hallway opposite of where Miller is. There is a boarded-up door. Now you can use the pile of junk for something. Go back to it and grab the metal bar from it. Use it on the door to get the boards loose and you’ll find yourself on the fire escape. Another cinematic and you’re back outside near your 4×4. Click on it and use the navcom to get to the office.
AT THE OFFICE
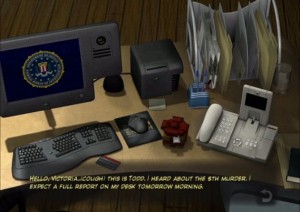 You arrive at the garage. Walk to the right side and use the elevator to go to the 8th floor. The doorway to the left is the actual office, where Victoria’s desk is. Go in here and click on the desk. Click on the answering machine to hear a message and grab the security access card. Take the little Christmas gift as well. You can also inspect the folders on the desk, which have the other victim’s files.
Now talk to Miller, sitting at the other desk. He says he will need Claire’s report, and that your photos need to be developed so he can use them in the report. Go back to the hallway, across the office entrance, and drop the camera in the evidence chute. Now go back to the elevator. Officer Tate comes out saying that Claire is waiting for you. Get in the elevator and click the B2 button.
Once you get out of the elevator, turn and try to go through the double doors. They’re locked, of course. Open your inventory and inspect the security card: VODKA is written on its back. This is the access code for the doors and each letter corresponds to a number on a phone number pad. So vodka will be 86352. Swipe the card and insert the numbers, then press ok. Walk through the doors on your left, and you’ll be in the morgue.
Click on Claire to talk to her. She briefs you on what happened at the crime scene, and she says you can take the report that is right by the victim’s head. Take the report and go back to the elevator, where Victoria receives a call from her father.
Take the elevator and go back to the 8th floor. Give Claire’s report to Miller. Tate is resting on a chair, you can talk to him if you want, but you don’t have to. Head back to the elevator and click on the B1 button. Walk to the car and use the navcom to get to Pat’s house.
PAT’S HOUSE
 This is where Victoria’s father lives. They exchange their Christmas presents, and Victoria receives a necklace that used to be her grandmother’s. Inspect the necklace – this is a clue for the solution of the next puzzle. Go upstairs into Victoria’s bedroom (door on the right side of the hallway) and enter the closet. There’s the attic door, but you can’t really reach it, so you need something to help you pull it down. Go downstairs and take the umbrella that’s on the coat rack. Go back up to the closet and use the umbrella on the attic door to bring the ladder down.
Find the light and activate it, so you can see what’s in the attic. There’s a big chest on the far side, click on it and you have your first puzzle. The objective is to match the symbols in the order as they are on the necklace.
Chest puzzle solution:
- Click three times on the second dial from the left.
- Click once on the middle dial.
- Click three times on the 4th dial.
- Click three times on the 5th dial (far right).
- Click the small button at the bottom.
This chest contains Victoria’s grandfather’s memoirs, which she will begin to read.